How to Collect Signatures With Online Forms
Paper consent forms and waivers are slow. Someone prints them, someone fills them in by hand, someone scans them, and then somebody has to find them again months later. An online form fixes most of that, but a form on its own is not always enough. For a liability waiver, a photo release or a client agreement you usually want a proper signed document, not just a row in a spreadsheet.
This guide shows how to collect signatures with online forms in FormsBat: the person fills in a form, their answers fill your own document, and that document goes straight to e-signature. At the end you get a sealed PDF with a certificate, filed in Drive next to the response.
Three ways to get a signature from a form
There is more than one way to collect a signature, and the right one depends on how formal the document needs to be.
- A drawn signature question. Add a signature question to the form and people draw their signature with a finger or mouse. It is quick and works well for things like a sign in sheet, a delivery note or a simple acknowledgement.
- A document with the signature on it. Turn on documents for the form, and each response creates a PDF or Word document that includes the answers and the drawn signature. Good for records you want to print or file.
- E-signature on the generated document. The document created from the response goes to the respondent for signature, with signature fields placed where your template says. When everyone has signed, you get a sealed PDF with a certificate. This is the one to use for waivers, consent forms and agreements.
You can combine them. Many people use a short form to collect the details, then send the generated document for e-signature.
Good uses for signed forms
- Consent forms for treatments, research, school trips or data processing. Start from the consent form template.
- Liability waivers for gyms, climbing walls, events and rentals. Try the liability waiver template.
- Photo and video releases for shoots and events, with the photo release template.
- Rental applications that end in a signed declaration, using the rental application template.
- Client intake where a new client agrees to your terms before the first appointment.
Step 1: Build the form
Open FormsBat forms and start from a template or a blank form. Ask for the details that need to appear in the document: full name, email, date, and anything specific to the agreement, such as the activity, the date of the event or an emergency contact.
Use the right question types so the data is clean. Email and phone questions check the format, the date question gives a date picker, and yes or no questions are ideal for statements like "I have read and understood the risks". Conditional logic can show extra questions only when they apply, for example a page for a parent or guardian when the participant is under 18.
The email question matters most here. It is where the signing link and the final signed copy will go.
Step 2: Connect your document
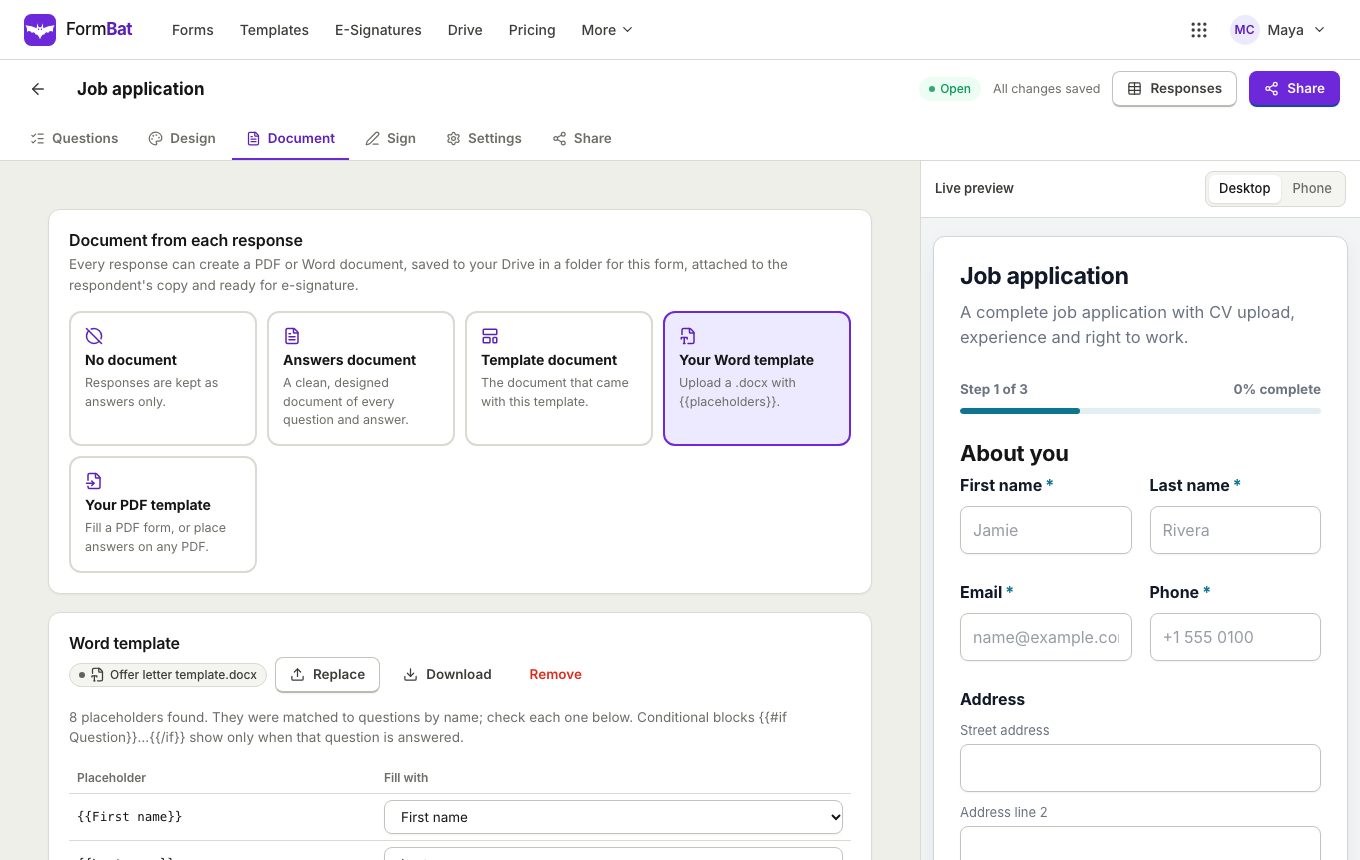
Next, decide what document each response should fill. Open the form's document settings and choose one of these:
- The built in answers document, in one of 5 designs. It lists every question and answer neatly and is available on every plan.
- Your own Word template. Write the waiver or consent form in Word exactly as you want it. Wherever an answer should appear, type a placeholder like
{{full_name}}or{{event_date}}. Wrap optional parts in an{{#if}}block, so a guardian paragraph only appears when it applies. Then add{{signature}}where the signature should go. - Your own PDF, fillable or flat. Map each answer to a field or spot on the page.
Your own Word and PDF templates are part of the Pro plan. See document templates for more detail on placeholders and blocks.
Step 3: Turn on e-sign
Turn on e-sign for the form. From then on, every response creates the document and sends it out for signature. FormsBat places a signature field at each {{signature}} spot in your template, so the signer sees exactly where to sign.
You choose who signs:
- The respondent, always.
- You, as the form owner, if you need to countersign.
- Fixed signers, such as a manager, a coach or a witness, who sign every document from this form.
The respondent does not need to wait for an email. Right after they submit, the thank you screen offers a button to sign the document straight away. If they close the page, they can still sign from the email link. Read more on the e-sign from forms page.
Step 4: Share the form
Publish the form and share it the way that suits your situation:
- A link at
/f/your-form, sent by email or message before the appointment. - An embed on your booking page or website, which resizes itself to fit.
- A QR code printed at the front desk, so people can sign on their own phone while they wait.
Spam protection is on by default, with a honeypot field, a minimum fill time and a rate limit, so your signature envelopes are not wasted on bots.
Step 5: Keep track of signed documents
Each response shows its document and its signing status. When every signer has finished, the sealed PDF and its certificate are saved to Drive in the folder for that form, and a copy can be emailed to the respondent. You can also see every envelope from the signing area.
The responses table lets you search for a name, sort by date or filter to a date range, and export everything to CSV or Excel if you need a list of everyone who signed.
What it costs
On the Free plan you can run as many forms as you like, collect 1,000 responses a month, use the built in answers document and send 3 signature envelopes a month. Pro is $4 a month and gives you 10,000 responses a month, no FormsBat branding, your own Word and PDF templates and unlimited envelopes. See the pricing page.
A quick checklist before you go live
- Read your template once with sample answers filled in. Check that every placeholder is spelled the same as the question it comes from.
- Submit a test response yourself and sign it, so you see what the signer sees.
- Make the email question required, otherwise the document has nowhere to go.
- Keep the wording of the waiver or consent form in the document, not only in the form, so the signed PDF stands on its own.
- If the document has legal weight, ask a qualified person to review the wording.
Ready to try it? Start from the consent form with signature guide or pick a template from the gallery.
Frequently asked questions
What is the difference between a drawn signature question and e-signature?
A drawn signature question captures a signature image as one of the answers on the form. E-signature sends the finished document to the signer, places signature fields at the right spots and produces a sealed PDF with a certificate.
Can the respondent sign straight after submitting?
Yes. When e-sign is turned on, the thank you screen offers a button to sign the document right away, so they do not have to wait for an email.
Can more than one person sign?
Yes. The document can go to the respondent and, if you choose, to you as the form owner and to fixed signers such as a manager or a witness.
Can I use my own consent form or waiver?
Yes. On Pro you can use your own Word template with placeholders or your own fillable or flat PDF. On the Free plan you can use the built in answers document.
How many signature requests can I send for free?
The Free plan includes 3 signature envelopes a month. Pro includes unlimited envelopes for $4 a month.